

Swift is a new ios programming language, it is also compatible with Object-c language, Object-c language can be used in Swift, but how to call Object-c language in swift file?
We all know that we can directly add Objective C files or create an Objective C file in a swift project, but if there is no Bridge in the project, you will not be able to use the Object-c file quickly. The following will teach you how to follow the steps to bridge Objective C to Swift file.

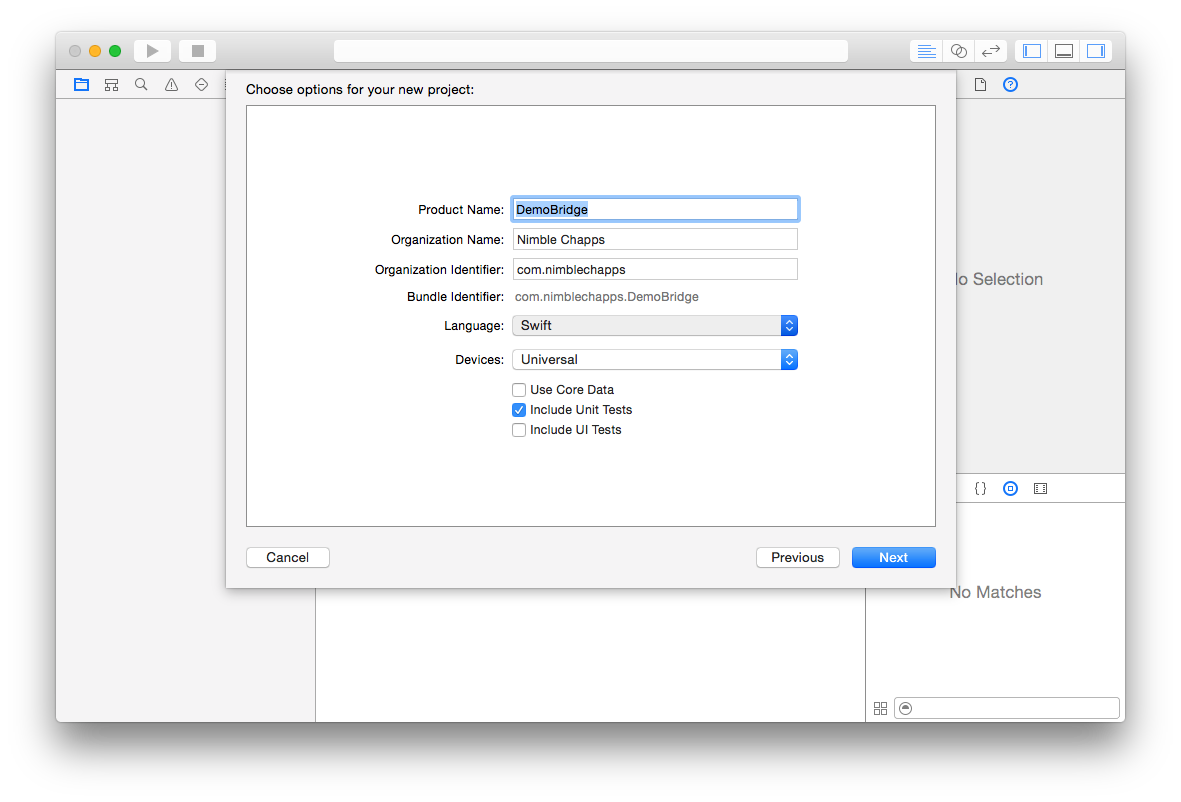
Step-1 : Create new Xcode project in Swift language,
Choose File > New > Project > DemoBridge
Step-2: In swift project adding new objective C file Name as : MyObjectiveFile

Step-3: When we add the object-c file, xcode will automatically remind us whether to create a bridging header bridging file, just confirm to create it

Step-4: When we click OK to generate the bridging header file, xcode will generate a bridging file named DemoBridge-Bridging-Header.h

Note: If we directly create this bridging file for calling object-c code in swift, we need to name the bridging file in the format of "your project-Bridging-Header.h" by ourselves
Step-5: After adding the Swift bridging file, click Project > target > Build Settings > Objective C bridging header, and drag the path of the previous DemoBridge-Bridging-Header.h into the box.

Step-6: Open your bridging file, such as "DemoBridge-Bridging-Header.h", import the file with your object-c code in it, the code is as follows:
#import "MyObjectiveFile.h"

Step-7: Use the method defined in object c in the code
override func viewDidLoad() {
    let myObject = MyObjectiveFile()
    print(myObject.Name())
}
Error : if you got the error that Bridging Header doen't exist.

If the above error occurs, please follow Step-5 and drag the bridge header file into the box again.


No comments:
Post a Comment
Note: only a member of this blog may post a comment.