


Introduction
Every website or blog can be used in order to generate passive income. There are many ways to monetize a website. However, you would agree that no one likes the idea of cluttering one’s site with an array of advertisements from a range of different ad networks. So it becomes logical to simply choose the best one. AdSense is probably the most popular service for this. It can be used to display text, video or image advertisements. As a website owner, you will be paid each time your visitors click on ads.
So what is Google AdSense? Let’s delve deeper into this before learning to add AdSense to WordPress.
What is Google AdSense?
AdSense is a CPC program from Google that allows webmasters to showcase ads on their blogs and websites. The best part about AdSense is the fact that it is one of the easiest and one of the best monetization options for website owners today, which can help them earn thousands, if done right. Publishers simply need to embed a small JavaScript code into their website(s). And that’s it!
If the account gets approved by Google, contextual ads will start appearing in various locations of the website. Your website would be automatically crawled by Google’s spiders in order to know more about your website’s pages. This helps Google bots in putting the best-fitting ads on your website. For example, if you love to blog about shoes, Google bots will take that as a clue and will put ads related to socks and footwear on your website. They do so by automatically checking their ads database and finding the most related ads on the basis of your WordPress website. It is obvious that a person who is reading about shoes is more likely to buy footwear than someone who is researching info about cyber security. Makes sense?
If the account gets approved by Google, contextual ads will start appearing in various locations of the website. Your website would be automatically crawled by Google’s spiders in order to know more about your website’s pages. This helps Google bots in putting the best-fitting ads on your website. For example, if you love to blog about shoes, Google bots will take that as a clue and will put ads related to socks and footwear on your website. They do so by automatically checking their ads database and finding the most related ads on the basis of your WordPress website. It is obvious that a person who is reading about shoes is more likely to buy footwear than someone who is researching info about cyber security. Makes sense?
Being a logical, honest and reliable method to monetize your WordPress blog is not the only reason why we recommend using Google AdSense, as it has many more advantages. Let’s have a quick look at each of them, before proceeding with adding AdSense to WordPress.
Reasons to Choose AdSense
- Easy to add multiple blogsYou can use it with mulitple websites. The only requirement is that your blogs should be in line with AdSense terms and policies. This is far better than most other ad networks where you need to add all your websites manually.
- Seamless support on the goNeedless to say, when you are dealing with AdSense, you are actually working with one of the top companies – Google. Rest assured, you can clear all your queries and doubts by accessing related customer forums. AdSense is very easy to get started with, even for beginners. There are tons of video and text tutorials, even websites that can help you become a pro in this field.
- Prompt paymentWhen you activate AdSense advertisement program on your website, you no longer need to worry about the payment. Many CPC companies are fraudulent and non-transparent in terms of payment, which is definitely not the case with AdSense where you’re paid on time, always.
- An easy way to make money with google adsenseA WordPress blog that you may have started as a hobby can also make you money with very little effort by simply placing some ads on it. What could be a better reason to opt for AdSense than this?
- Flexible ad formatsGoogle AdSense provides you the freedom of displaying a range of ads on your website, based on the available space and layout of your site. Further, you don’t even need to create ads for your website – all of this is taken care of by Google. All you need to do is get the JavaScript code and simply paste it to the ad placement area.
The manual method of adding AdSense to your WordPress website seems too tough for you? Well, fret not! Here are a few plugins which would help you in this purpose.
Table of Contents
[optin-monster-shortcode id="cgx87nzwxn0himxw62bn"]
What you’ll need
Before you begin this guide, you’ll need the following:
Step 1 — Signing up for Google AdSense
First of all, you need to sign up for Google Adsense account. It can be done here. The sign up process is easy and will take only a few minutes. However, it can take up to 3 days for Google to check and approve your application.
Step 2 — Creating AdSense Ad
Once your account is approved, you can start creating ads:
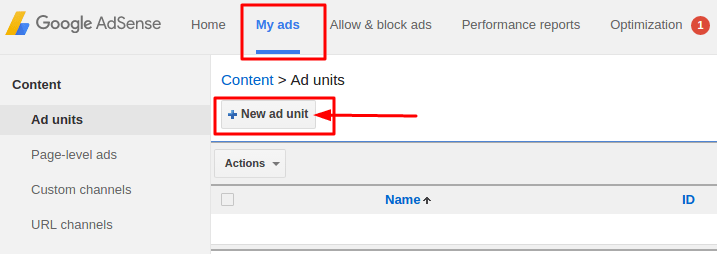
- Access the Adsense dashboard and press the My Ads button, which is located in the top menu.
- Hit the New ad unit button.
- Enter the necessary settings for your ad. These settings are important as they help to customize your ad and make it more suitable for your website design:
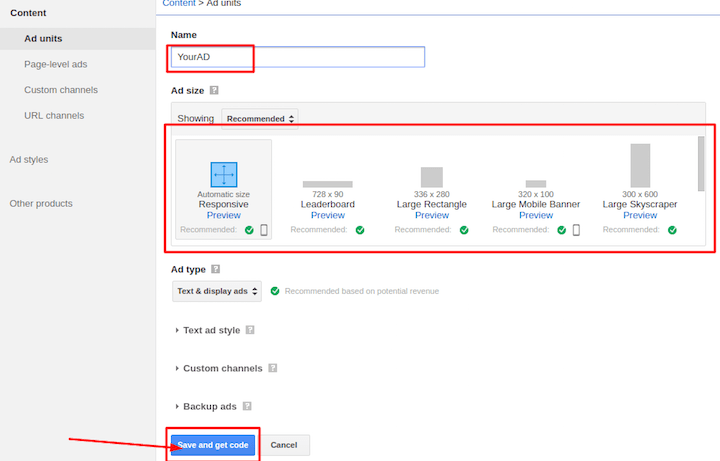
- Name – The name of your ad. Enter a unique name here – it will be easier to manage multiple ads in the future.
- Ad size – It’s a very important setting, because ad sizes make a great impact on the view of your website. It’s recommended to select Responsive if your website is adapted to all devices.
- Press Save and get code. A new window with your Adsense code will appear. It will look similar to this code:
- Select and copy the code – you will need it in the next step.
If you need a more detailed guide on how to create an ad, see the official Adsense Help page.
Step 3 — Adding AdSense to WordPress
Option 3.1 – Using Google Adsense Plugin
One of the easiest ways to insert Google Adsense to WordPress is by using plugins. There are many different plugins created for this purpose. Below you can find the three most popular plugins you can install from the official plugins directory:
Google AdSense
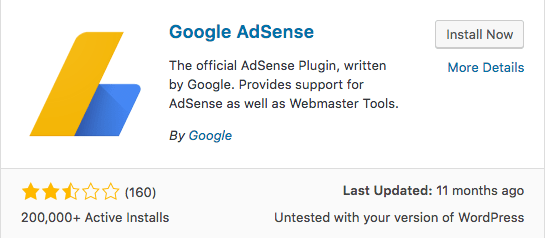
Google AdSense, also known as Google Publisher plugin, is an official AdSense plugin written and managed by Google. This plugin helps you to easily add AdSense to your WordPress website due to its easy-to-use interface.
Advantages:
- Easy to add AdSense to your WordPress website
- Activate mobile-specific ad layouts on the go
- Easy point and click interface for a quick management of ads
Ad Injection
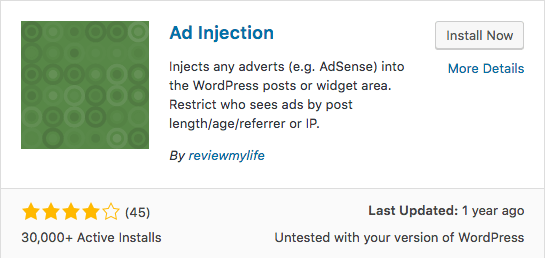
Ad Injection is another great plugin through which you can integrate AdSense with your WordPress blog or website on the go. This plugin is not just limited to AdSense but can also help you with integrating ads from other networks too. Not only that, AdSense allows you to control the visibility of ads – you can adjust them by your posts length or age and IP address of the visitor.
Advantages:
- Allows you to automatically inject adverts without modifying your posts
- Helps to perform split testing by allowing you to define multiple ads for the same ad space
- Can help you in injecting anything, including the likes of a common header or footer, tracking scripts, social networking button and others
Disadvantages:
- Complicated to use and non-user-friendly
- May be non-compatible with the latest WordPress version
Ad Inserter

Ad Inserter is a powerful plugin that would help you with inserting AdSense ads on your WordPress website.
Advantages:
- Easy to display ads on various locations
- Comes with an automatic display option that allows the plugin to automatically choose locations
- 16 code blocks
Disadvantages:
- At times, might refuse Google AdSense responsive ads.
Option 3.2 – Inserting Ads Manually
Another way to insert an ad into WordPress is by creating a new widget. The biggest advantage of this method is that you do not need to install any plugins. Follow the steps below in order to create a new widget and insert the Adsense code:
- Log in to your WordPress dashboard, navigate to Appearance -> Widgets section.
- To add a new widget, select Text and drag and drop it to the place where you want to display the ads. In this example, we decided to put Adsense to Sidebar, but you can choose any part of your website. Press the Add Widget button.
- Fill the Title and Content fields.
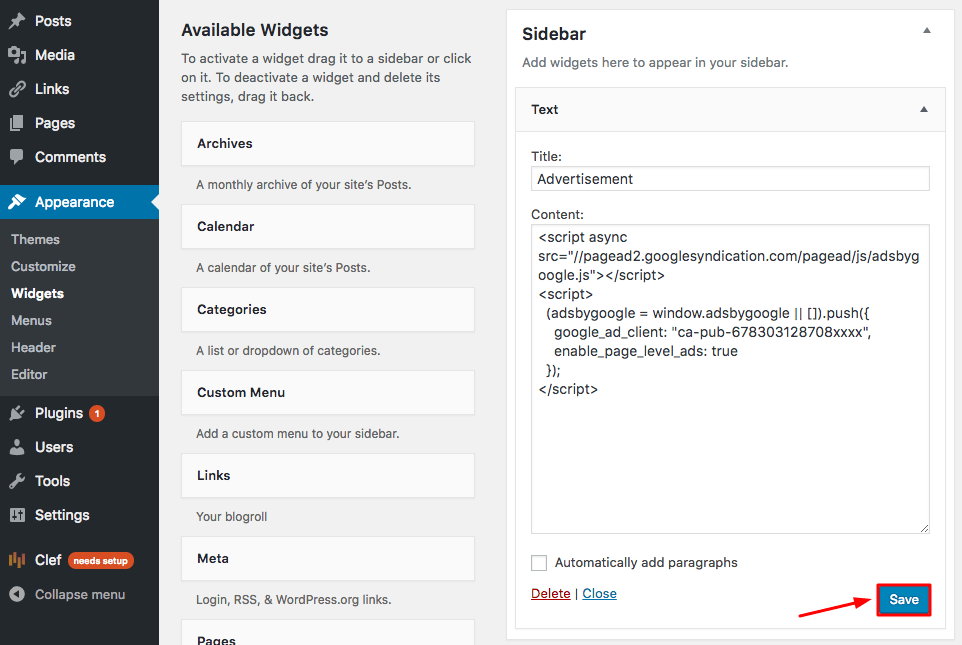
- Title – Enter the name of your widget (you can leave it empty).
- Content – Paste the copied code from Google Adsense website.
- Once you are done press the Save button.
AdSense Best Practices
So, all set? Here are a few best practices that could help you in getting more clicks on ads, thus helping you in earning better.
- Research well before getting startedIt is highly recommended to follow AdSense rules in order to get your AdSense account approved quickly. Further, it is also suggested to select a high paying niche for your blog, which means selecting a niche that is often researched by people on Google.
- Proper ad placementThe position of the ad on your web page determines your revenue to a great extent. You should place ads on the top of the page, using both images and text ads. If placing an ad on a page with a lot of content, you might like to include an ad between the texts too.
- Choose the right AdSense sizesIf your main aim is to earn via AdSense, it is highly recommended to choose the size of ads carefully. Some of the sizes that work best include 336×280, 728×90, and 160×600.
- Track category performanceMake the best use of category blocking feature of AdSense and avoid placing ads that belong to the categories that do not yield better earnings.
Here are a few extra do’s and dont’s that you should keep in mind in order to get maximum benefits:
Do’s
- Make the best use of AdSense heatmaps in order to better understand the psychology of your visitors and design your website accordingly. This will help you get more clicks, and thereby more income.
- Write good and engaging content that would attract users to your website and would thus increase the chances of getting clicks on your ads.
- Conduct Google experiments to split-test: what is working for your website and what is not.
- Make sure that both your website and the ads are responsive.
- Keep yourself up-to-date with their latest policies.
- Contrast and design your ad styles in accordance with your website theme.
Dont’s
- Don’t overuse AdSense and don’t clutter your website with too many ads as this will bounce off the visitors, thus minimizing your earnings.
- Don’t click on your AdSense ads even by mistake and don’t ask your family members or friends to click on them for you. Fraudulent clicks will get your account banned.
- Avoid making use of texts like ‘Click on ads’. Such texts are considered as forcing users to click on your ads and is against Google AdSense policies.
- Don’t place ads on empty pages.
- Avoid bringing automated traffic to your website at all costs.
- Don’t make multiple AdSense accounts with the same payee name.
Conclusion
This simple tutorial intended to show how you can add Adsense to WordPress and monetize your website. Now it all depends on you – publish quality content and advertise your website in order to start earning money from Adsense ads. However, care should be taken that your cent per cent is in accordance with their guidelines as there are some areas for which AdSense has zero tolerance and might block your account immediately.
Rest assured, Google AdSense is easy to integrate with your website and you can do it either way- manually or with the help of a plugin. Keep in mind the above-mentioned pointers and keep making money online.


No comments:
Post a Comment
Note: only a member of this blog may post a comment.